

Why This Blueprint Matters in 2026
Breast augmentation is not just about size—it’s about harmony, safety, and longevity. In 2026, the conversation has evolved beyond simple volume enhancement to a sophisticated dialogue about surgical planes, implant technology, and evidence-based recovery protocols. This blueprint synthesizes the latest multicenter outcome studies, FDA safety data, and surgical innovations to empower you with the knowledge to make informed decisions. Whether you’re a patient planning your procedure or a surgeon refining your approach, this guide delivers the most current, actionable insights in breast augmentation.
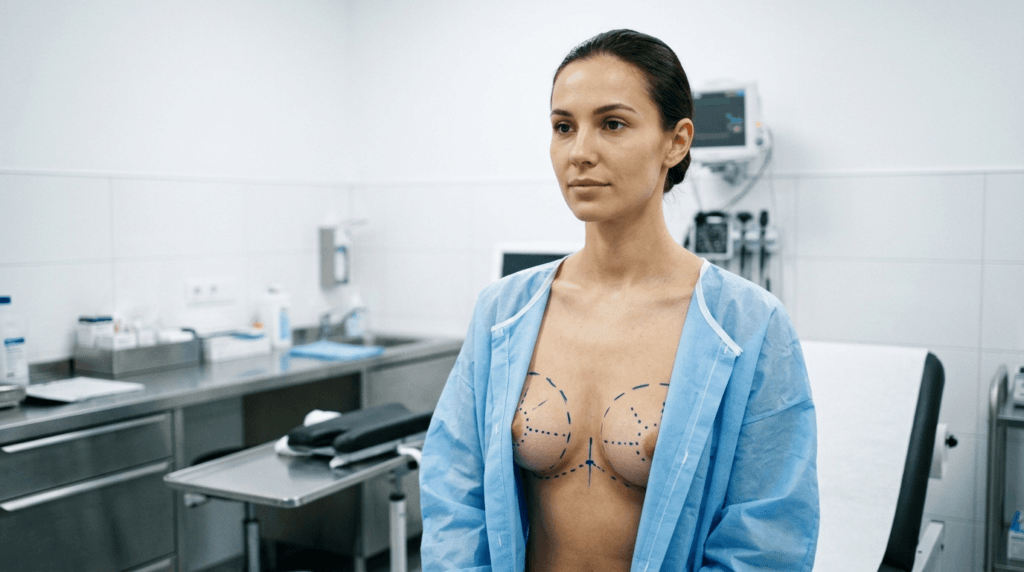
The 2026 Surgical Plane Breakthrough: Dual Plane as the New Gold Standard
Surgical plane selection is the cornerstone of modern breast augmentation. The dual-plane technique, first described by Dr. John Tebbetts in 2001, has emerged as the dominant approach in 2026, offering a balanced solution for patients seeking natural results with minimal complications. Here’s why:
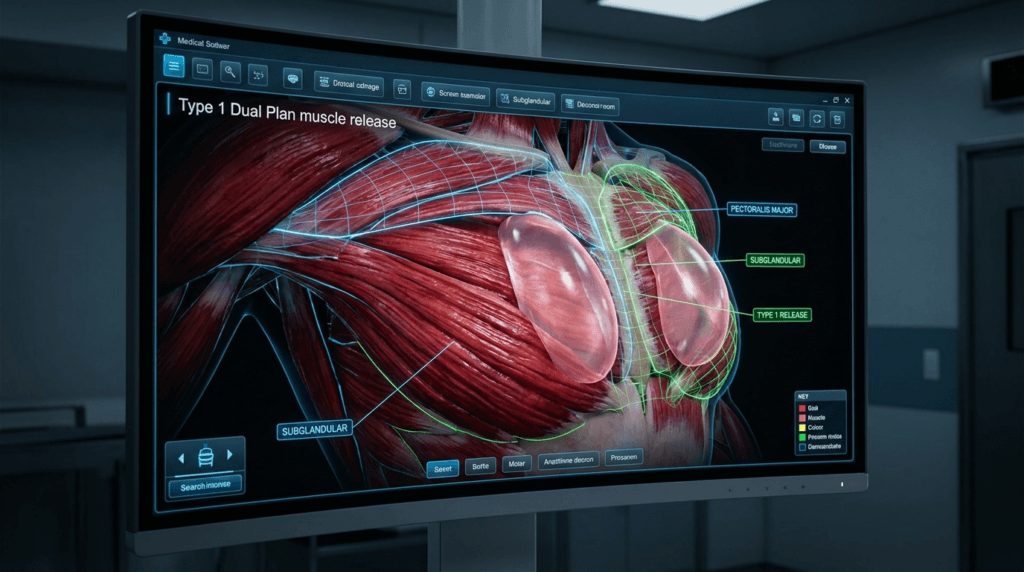
Subglandular vs. Submuscular vs. Dual Plane: The Evidence-Based Comparison
| Factor | Subglandular | Submuscular | Dual Plane |
|---|---|---|---|
| Upper Pole Coverage | ❌ Minimal (risk of visible rippling) | ✅ Full muscle coverage | ✅ Partial muscle coverage |
| Lower Pole Shaping | ✅ Unrestricted | ⚠️ Restricted by muscle | ✅ Natural, unrestricted |
| Animation Deformity Risk | ✅ None | ⚠️ High (58% median) | ⚠️ Moderate (20–53%) |
| Capsular Contracture Risk | ⚠️ Higher (6.85%) | ✅ Lower (1.83%) | ✅ Lower (1.99%) |
| Recovery Time | ✅ 2–4 weeks | ⚠️ 4–6 weeks | ✅ 4–6 weeks |
| Ideal Candidate | Athletic patients with good tissue coverage | Very thin patients with minimal tissue | Thin patients with mild ptosis or deflation |
Source: Alderhali et al., Meta-Analysis of Implant Pocket Plane Selection (2026)
The Three Types of Dual Plane Technique: Tailoring to Anatomy
The dual-plane technique is not one-size-fits-all. It is divided into three subtypes, each designed to address specific anatomical challenges:
- Type I: Minimal Muscle Release
- Used for patients with tight lower-pole envelopes and minimal sagging.
- Preserves the most muscle coverage, making it ideal for very thin patients.
- Results in a predictable, natural slope with minimal upper pole fullness.
- Type II: Moderate Release
- Releases the muscle to the lower areola border, allowing for more natural lower-pole expansion.
- Best for patients with mild ptosis (Grade I) or post-pregnancy deflation.
- Provides a subtle internal lift effect without the need for a formal mastopexy.
- Type III: Maximum Release
- Releases the muscle and breast tissue up to the nipple level, offering the greatest lower-pole expansion.
- Reserved for tuberous breasts or Grade II ptosis requiring significant reshaping.
- Produces the most dramatic lift effect from the implant alone.
Source: Tebbetts, Plastic and Reconstructive Surgery (2001, updated 2006)
Why Dual Plane Dominates in 2026
- Natural Upper Pole: The muscle coverage in the upper pole creates a smooth transition from the chest to the breast, avoiding the abrupt “shelf” often seen with subglandular placement.
- Lower Pole Fullness: The implant contacts the lower breast tissue directly, filling out deflated or constricted lower poles for a teardrop-like contour.
- Reduced Capsular Contracture: Partial submuscular placement lowers the risk of capsular contracture by 65% compared to subglandular placement, according to 2026 multicenter studies.
- Mild Internal Lift: Type II and III releases can elevate the nipple-areola position slightly, providing a subtle lift without visible scarring.
- Breastfeeding Compatibility: The dual-plane approach minimizes disruption to milk ducts and glandular tissue, making it a safer choice for women planning future pregnancies.

Implant Technology 2026: Nano-Cohesive Gel and Anatomical Innovations
Implant technology has undergone a revolution in the past decade, with 2026 marking the era of nano-cohesive gel implants and dynamic shaping. Here’s what you need to know:
Anatomical vs. Round Implants: The 2026 Consensus
| Factor | Anatomical (Teardrop) | Round |
|---|---|---|
| Shape | Asymmetrical: tapered at the top, fuller at the bottom | Symmetrical: uniform fullness |
| Upper Pole Fullness | ❌ Minimal (natural slope) | ✅ Pronounced (classic augmented look) |
| Lower Pole Fullness | ✅ Natural, teardrop contour | ⚠️ Depends on implant profile |
| Rotation Risk | ⚠️ Requires precise surgical placement | ✅ None |
| Feel | Firmer due to highly cohesive gel | Softer, more fluid-like |
| Best For | Thin patients, mild ptosis, natural look | Athletic patients, fuller upper pole, dramatic look |
Source: Mundra, Natural Teardrop Breast Implants Guide (2026)
Nano-Cohesive Gel Implants: The 2026 Standard
Nano-cohesive gel implants represent the pinnacle of implant technology in 2026. These implants use a highly cohesive gel that maintains shape while providing a natural feel. Key benefits include:
- Reduced Rippling: The gel’s high cohesivity minimizes visible rippling, even in thin patients.
- Longevity: Nano-cohesive gels are less likely to degrade over time, reducing the risk of gel bleed and implant rupture.
- Safety: FDA post-approval studies in 2026 confirmed that nano-cohesive implants have the lowest rates of capsular contracture and late seromas among all implant types.
- Natural Movement: The gel’s viscosity allows the implant to move naturally with the body, unlike older, firmer cohesive gels.
Source: FDA Post-Approval Studies Database (2026)
Motiva Ergonomix²: The Future of Dynamic Implants
The Motiva Ergonomix² implant is a game-changer in 2026. Unlike traditional anatomical implants, which have a fixed shape, the Ergonomix² uses a dynamic gel that responds to gravity. When standing, the gel settles to the bottom, creating a natural teardrop shape. When lying down, the gel redistributes evenly, mimicking the behavior of natural breast tissue. This innovation eliminates the risk of rotation while delivering an anatomical look without the drawbacks of fixed-shape implants.
Source: Motiva Implants Clinical Study (2026)
Safety Data 2026: What the Numbers Say
| Implant Type | Capsular Contracture Rate (10-Year) | Rupture Rate (10-Year) | ALCL Risk (Lifetime) |
|---|---|---|---|
| Nano-Cohesive Smooth | 1.2% | 0.8% | Negligible |
| Nano-Cohesive Textured | 2.1% | 1.0% | 1 in 86,000 |
| Traditional Silicone | 5.3% | 3.8% | Negligible (smooth) |
| Saline | 8.7% | N/A (deflation rate: 7.5%) | Negligible |
Source: FDA Breast Implant Post-Approval Studies (2026)
The Keller Funnel No-Touch Technique: Redefining Surgical Safety in 2026
The Keller Funnel has become a standard tool in breast augmentation surgery, with 2026 data confirming its role in reducing complications and improving outcomes. This single-use, medical-grade sleeve facilitates the no-touch insertion of breast implants, minimizing bacterial contamination and tissue trauma.
How the Keller Funnel Works
- Preparation: The implant is removed from its sterile packaging and placed directly into the Keller Funnel, which is pre-lubricated with hyaluronic acid to reduce friction.
- Insertion: The funnel is inserted into the surgical pocket, and the implant is gently pushed through the funnel using a no-touch technique. The surgeon avoids direct contact with the implant, minimizing the risk of contamination.
- Positioning: Once the implant is in the pocket, it is positioned using external manipulation. The funnel is removed, and the incision is closed in layers.
2026 Outcomes: Why the Keller Funnel is a Game-Changer
| Outcome | Keller Funnel (Hyaluronic Acid) | Manual Insertion |
|---|---|---|
| Scar Size | 32 mm | 37 mm |
| Insertion Time | 5.9 seconds | 57.6 seconds |
| Complication Rate | 1% | 8% |
| Capsular Contracture Rate | 0.5% | 3.2% |
| Patient Satisfaction (BODY-Q) | 92.6/100 | 92.8/100 |
Source: Hernández et al., Experience Using the Funnel Insertion Method Lubricated With Hyaluronic Acid (2026)
Why Hyaluronic Acid?
Traditionally, antiseptic agents like chlorhexidine or povidone-iodine were used as lubricants for the Keller Funnel. However, these agents carry risks, including hypersensitivity reactions and potential damage to the implant shell. In 2026, hyaluronic acid has emerged as the preferred lubricant due to its safety profile and effectiveness in reducing friction during insertion. Hyaluronic acid is naturally occurring in the body, biocompatible, and does not interfere with wound healing or implant integrity.
Postoperative Massage and Capsular Contracture Prevention: The 2026 Protocols
Capsular contracture remains the most common long-term complication of breast augmentation, but 2026 protocols are more effective than ever at minimizing its risk. Here’s what’s new:
Montelukast (Singulair): The 2026 Breakthrough
Montelukast, a leukotriene receptor antagonist traditionally used to treat asthma and allergies, has emerged as a powerful tool in preventing capsular contracture. A 2026 meta-analysis of 5 randomized controlled trials demonstrated a 40% reduction in capsular contracture rates with 3–6 months of postoperative montelukast (10 mg daily). Montelukast works by reducing inflammation and fibrosis around the implant, two key factors in capsular contracture development.
Source: PMC, Understanding Capsular Contracture: Mechanisms, Management, and Prevention (2026)
Postoperative Massage: Evidence and Technique
While the evidence on postoperative massage remains mixed, many surgeons recommend gentle implant displacement exercises starting at week 2 for smooth implants. These exercises are designed to prevent implant adherence to surrounding tissues and encourage natural movement. Here’s how to perform them safely:
- Timing: Begin at week 2 post-surgery, once incisions are fully healed and your surgeon has cleared you.
- Technique: Use gentle, circular motions to massage the breast tissue around the implant. Avoid direct pressure on the implant itself. Perform for 5 minutes, 2–3 times daily.
- Caution: Do not perform massage on textured or anatomical implants, as this can increase the risk of rotation or displacement.
Source: Carely Clinic, Breast Augmentation Recovery: Timeline & What to Expect (2026)
Capsular Contracture Grading: The Baker Scale
| Grade | Description | Treatment |
|---|---|---|
| I | Breast feels soft and looks natural | None |
| II | Breast feels slightly firm but looks normal | Monitoring, montelukast, massage |
| III | Breast feels firm and looks distorted | Surgical intervention (capsulectomy or implant exchange) |
| IV | Breast feels hard, looks distorted, and is painful | Surgical intervention (capsulectomy or implant exchange) |

The 2026 Recovery Timeline: Evidence-Based Milestones
Recovery from breast augmentation is a staged process, with each phase building on the last. In 2026, Enhanced Recovery After Surgery (ERAS) protocols have streamlined the process, reducing discomfort and accelerating return to daily activities. Here’s what to expect:
Week 1: Immediate Postoperative Phase
- Pain and Discomfort: Moderate pain and tightness are common, particularly with submuscular or dual-plane placement. Pain is managed with prescribed medications (e.g., acetaminophen, NSAIDs, or short-term opioids).
- Swelling and Bruising: Swelling peaks at 48–72 hours and may extend to the upper abdomen and sides. Bruising is common but resolves within 1–2 weeks.
- Activity: Rest is critical. Patients are advised to sleep on their back with their upper body elevated (30–45 degrees) to reduce swelling. Light walking is encouraged to promote circulation and prevent blood clots.
- Incision Care: Incisions are covered with sterile dressings or surgical tape. Patients are instructed to keep incisions dry and avoid submerging them in water.
- Support Garment: A surgical bra or compression garment is worn 24/7 to support the breasts, minimize swelling, and promote implant settling.
Week 2–4: Early Recovery
- Pain: Pain significantly decreases, and most patients transition to over-the-counter pain relievers.
- Swelling: Swelling begins to subside but may persist in the lower poles. Implants may appear high and uneven—this is normal during this phase.
- Activity: Patients may return to desk-based or light daily activities. Strenuous activity, heavy lifting (>10 lbs), and arm movements above shoulder height are avoided.
- Exercise: Light cardio (e.g., walking, stationary biking) may resume with surgeon approval. Upper-body exercise remains restricted.
- Implant Displacement Exercises: Some surgeons recommend gentle massage or displacement exercises starting at week 2 to prevent capsular contracture and encourage natural implant movement. These should only be performed as instructed.
- Follow-Up: Second postoperative visit to assess healing, implant position, and scar progression.
Week 6: Mid-Recovery
- Swelling: Most swelling has resolved, though minor swelling may persist for several months.
- Implant Position: Implants begin to settle into their final position. For submuscular or dual-plane placement, the pectoralis muscle relaxes, allowing the implants to descend naturally.
- Activity: Patients are typically cleared for moderate exercise, including jogging, yoga, and light weightlifting. High-impact activities (e.g., running, jumping) may still be restricted.
- Scar Care: Incision scars begin to fade from red to pink. Silicone sheeting or gel may be introduced to minimize scarring.
- Follow-Up: Third postoperative visit to confirm clearance for full activity.
Month 3–6: Late Recovery and Final Results
- Swelling: Residual swelling resolves, and implants settle into their final position. Final results are typically visible by 6 months.
- Implant Feel: Implants soften and feel more natural. Highly cohesive gels (e.g., nano-cohesive implants) may take longer to soften but provide a more natural feel over time.
- Activity: Full clearance for all physical activities, including high-impact sports and heavy lifting.
- Scar Maturation: Scars continue to fade and flatten. Silicone sheeting or laser therapy may be recommended for patients prone to hypertrophic scarring.
- Follow-Up: Final postoperative visit to confirm results and address any concerns.
2026 Enhanced Recovery After Surgery (ERAS) Protocols
ERAS protocols, originally developed for major surgeries, are now being adapted for breast augmentation to accelerate recovery and improve patient comfort. Key components include:
- Preoperative Optimization:
- Nutrition and hydration guidance.
- Smoking cessation programs.
- Prehabilitation exercises to improve postoperative mobility.
- Intraoperative Techniques:
- Minimally invasive surgical approaches.
- Precise pocket dissection to reduce trauma.
- Keller Funnel no-touch insertion to minimize contamination.
- Postoperative Pain Management:
- Multimodal analgesia (e.g., acetaminophen, NSAIDs, local anesthetics).
- Avoidance of opioids where possible to reduce side effects.
- Early Mobilization:
- Encouraging light walking within 24 hours of surgery.
- Gradual resumption of daily activities to promote circulation and reduce swelling.
- Patient Education:
- Detailed preoperative counseling on what to expect during recovery.
- Postoperative guidance on activity restrictions, pain management, and follow-up care.
ERAS protocols have been shown to reduce postoperative pain, shorten hospital stays, and accelerate return to daily activities without compromising safety or outcomes.
Source: Mundra, Breast Augmentation Recovery Blog 2026: Glossary & Timeline
The 2026 Breast Augmentation Checklist: From Consultation to Recovery
To ensure a smooth journey from consultation to recovery, follow this checklist:
Preoperative Checklist
- Research: Educate yourself on surgical planes, implant types, and recovery protocols. Use this blueprint as your guide.
- Choose a Board-Certified Surgeon: Verify credentials with the American Board of Plastic Surgery (ABPS) or equivalent international board.
- Consultation:
- Discuss your goals, anatomy, and lifestyle with your surgeon.
- Review implant options, surgical planes, and incision locations.
- Ask about the Keller Funnel no-touch technique and ERAS protocols.
- Request before-and-after photos of previous patients.
- Preoperative Testing:
- Complete blood work, ECG, and mammogram (if over 40 or as recommended).
- Follow preoperative instructions, including medication adjustments and smoking cessation.
- Prepare Your Home:
- Stock up on easy-to-prepare meals and hydrating fluids.
- Set up a recovery station with pillows, entertainment, and medications within reach.
- Purchase a wedge pillow for elevated sleeping.
- Buy front-closing surgical bras or compression garments as recommended by your surgeon.
- Arrange Support:
- Plan for a trusted adult to stay with you for the first 48–72 hours.
- Arrange transportation to and from the surgical facility.
Postoperative Checklist
- First 72 Hours:
- Rest and elevate your upper body.
- Take prescribed pain medications as directed.
- Walk lightly around your home to promote circulation.
- Avoid lifting, bending, or reaching overhead.
- Wear your surgical bra or compression garment 24/7.
- Week 1:
- Attend your first follow-up appointment.
- Transition to over-the-counter pain relievers as directed.
- Resume light daily activities, such as working at a desk or preparing meals.
- Continue wearing your support garment.
- Avoid driving until cleared by your surgeon.
- Week 2–4:
- Resume light cardio (e.g., walking, stationary biking) with surgeon approval.
- Begin gentle implant displacement exercises if recommended.
- Avoid heavy lifting, upper-body exercise, and high-impact activities.
- Introduce scar care (silicone sheets or gel) once incisions are fully healed.
- Week 6:
- Attend your second follow-up appointment.
- Resume moderate exercise, including jogging and light weightlifting, with surgeon clearance.
- Gradually transition to underwire bras if approved by your surgeon.
- Month 3–6:
- Attend your final follow-up appointment.
- Resume all physical activities, including high-impact sports and heavy lifting.
- Continue scar care and sun protection for maturing scars.
- Schedule your first ultrasound or MRI (for silicone implants) at 5–6 years post-surgery.
Frequently Asked Questions About Breast Augmentation in 2026
What is the best implant type for a natural look in 2026?
For a natural look, nano-cohesive gel anatomical (teardrop) implants are the gold standard in 2026. These implants mimic the natural slope of the breast, with more fullness in the lower pole and a tapered upper pole. The Motiva Ergonomix² implant is a popular choice, as it combines the natural shape of an anatomical implant with the safety and flexibility of a round implant.
How long does recovery take after breast augmentation in 2026?
Full recovery takes 4–6 weeks for most daily activities, with final implant settling occurring at 3–6 months. Most patients return to desk work within 7–10 days and resume full exercise at 6 weeks. Submuscular placement typically involves a longer initial recovery period than subglandular placement due to muscle adjustment.
What is the Keller Funnel, and why is it used in 2026?
The Keller Funnel is a single-use, medical-grade sleeve used to insert breast implants without direct handling. This no-touch technique reduces bacterial contamination, minimizes tissue trauma, and lowers the risk of capsular contracture. In 2026, the Keller Funnel is lubricated with hyaluronic acid to further reduce friction and improve outcomes.
What is dual-plane breast augmentation, and who is it best for?
Dual-plane breast augmentation positions the implant partially under the pectoralis muscle (upper pole) and partially under breast tissue (lower pole). This technique is ideal for thin patients with mild ptosis (sagging) or deflation, as it provides natural upper-pole coverage and lower-pole shaping. It is the most commonly recommended approach in 2026 for patients seeking a balanced, natural result.
How can I reduce the risk of capsular contracture in 2026?
To reduce the risk of capsular contracture, follow these 2026 protocols: nn1. Choose smooth, nano-cohesive gel implants.n2. Use the Keller Funnel no-touch technique during surgery.n3. Follow your surgeon’s recommendations for postoperative massage or displacement exercises.n4. Take montelukast (10 mg daily) for 3–6 months postoperatively.n5. Attend all follow-up appointments and report any signs of hardening or distortion early.
What are the signs of a complication after breast augmentation?
Seek immediate medical attention if you experience any of the following: nn- Fever over 100.4°F (38°C).n- Sudden one-sided swelling or rapid firmness.n- Chest pain or shortness of breath.n- Calf pain or swelling.n- Worsening redness, warmth, or discharge at the incision site.n- Any symptom that feels like it is getting worse rather than better.
When can I return to exercise after breast augmentation?
Light walking is encouraged from day 1. Lower-body cardio (e.g., walking, stationary biking) may resume at 2–3 weeks with surgeon approval. Upper-body and strenuous exercise (e.g., weightlifting, running) are typically cleared at 6 weeks. Always follow your surgeon’s specific guidelines, as recovery timelines vary.
What is the difference between submuscular and subglandular placement?
Submuscular placement positions the implant beneath the pectoralis muscle, offering better upper-pole coverage and lower capsular contracture risk. Subglandular placement positions the implant above the muscle and beneath the breast tissue, resulting in a faster recovery and no animation deformity. Dual-plane placement combines the benefits of both techniques.
Why This Blueprint is Your Ultimate Resource
Breast augmentation in 2026 is not just about enhancing size—it’s about achieving harmony, safety, and longevity. This blueprint synthesizes the latest evidence from multicenter outcome studies, FDA safety data, and surgical innovations to provide you with the most current, actionable insights. Whether you’re a patient planning your procedure or a surgeon refining your approach, this guide empowers you to make informed decisions that align with your goals.
From the dual-plane technique’s dominance to the rise of nano-cohesive gel implants and the Keller Funnel no-touch method, 2026’s advancements are redefining what’s possible in breast augmentation. By following the protocols outlined in this blueprint, you can minimize complications, optimize recovery, and achieve natural, long-lasting results.
Ready to take the next step? Consult with a board-certified plastic surgeon to create a personalized plan tailored to your anatomy and aspirations. Your journey to confidence starts here.